Triggers
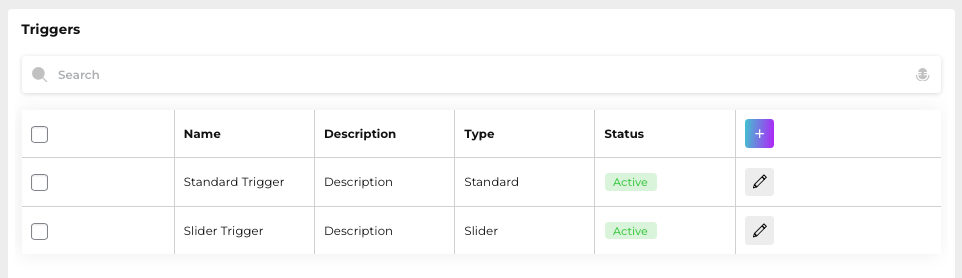
The Triggers feature allows you to proactively engage visitors on your website through automated, interactive messages. You can use triggers to increase conversions, offer support, and guide users through your content. This section includes three trigger types, each suited for different scenarios and interactions.
Standard Trigger
Use the Standard Trigger to send simple and direct chat messages based on visitor behavior or specific conditions.
How to create a Standard Trigger:
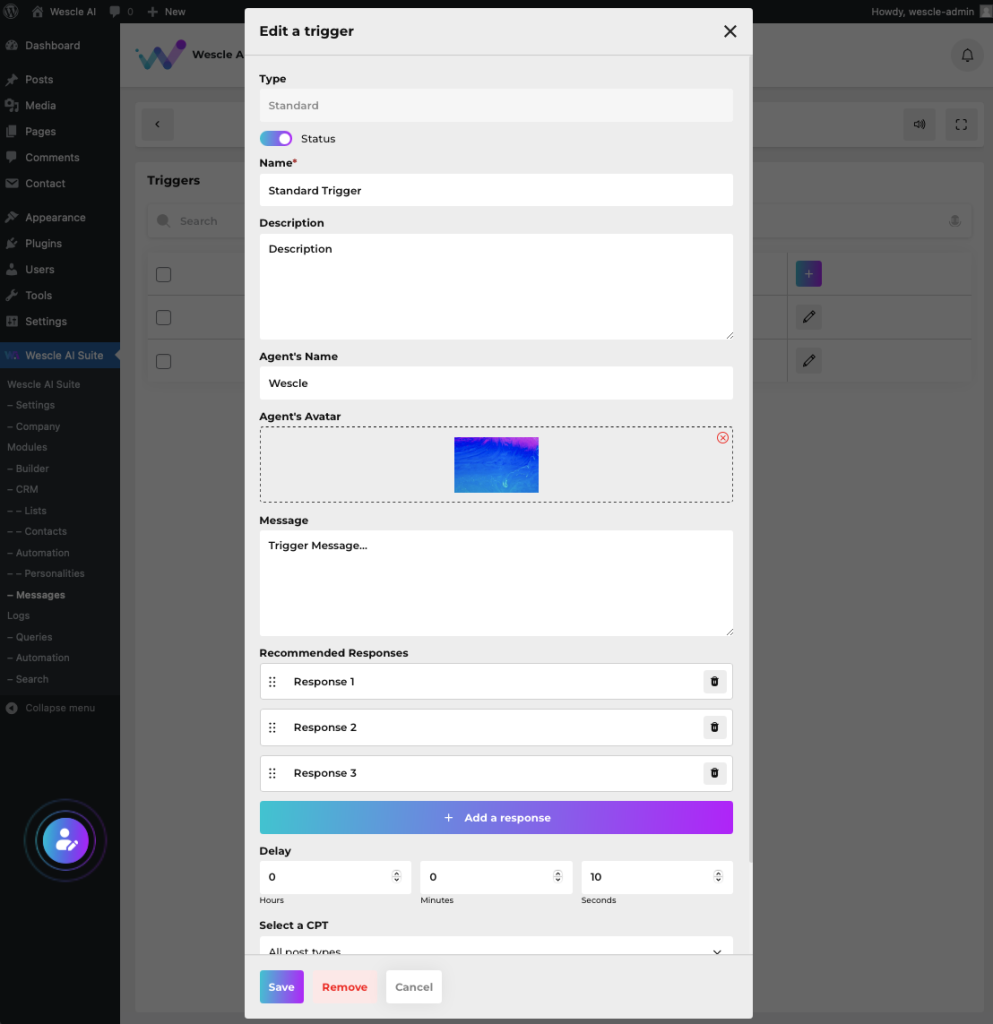
• Click the ”+” icon to add a new trigger.
• Select “Standard” under Type.
• Fill out the following:
• Name: Give a clear, identifiable name.
• Description: Add a short description (optional).
• Agent’s Name & Avatar: Customize who sends the message.
• Message: Write the message you want to deliver to the visitor.
• Recommended Responses: Add quick-response options visitors can click to reply easily.
• Delay: Set the delay (in hours, minutes, or seconds) before the trigger message appears after conditions are met.
• Select a CPT or Visitor Page Link: Choose when and where the message activates:
• Specific custom post types (CPT).
• Specific URL or page.
• Click “Save” to activate the trigger.
Slider Trigger
Use the Slider Trigger for more visually engaging messages, perfect for promotions, announcements, or featured content.
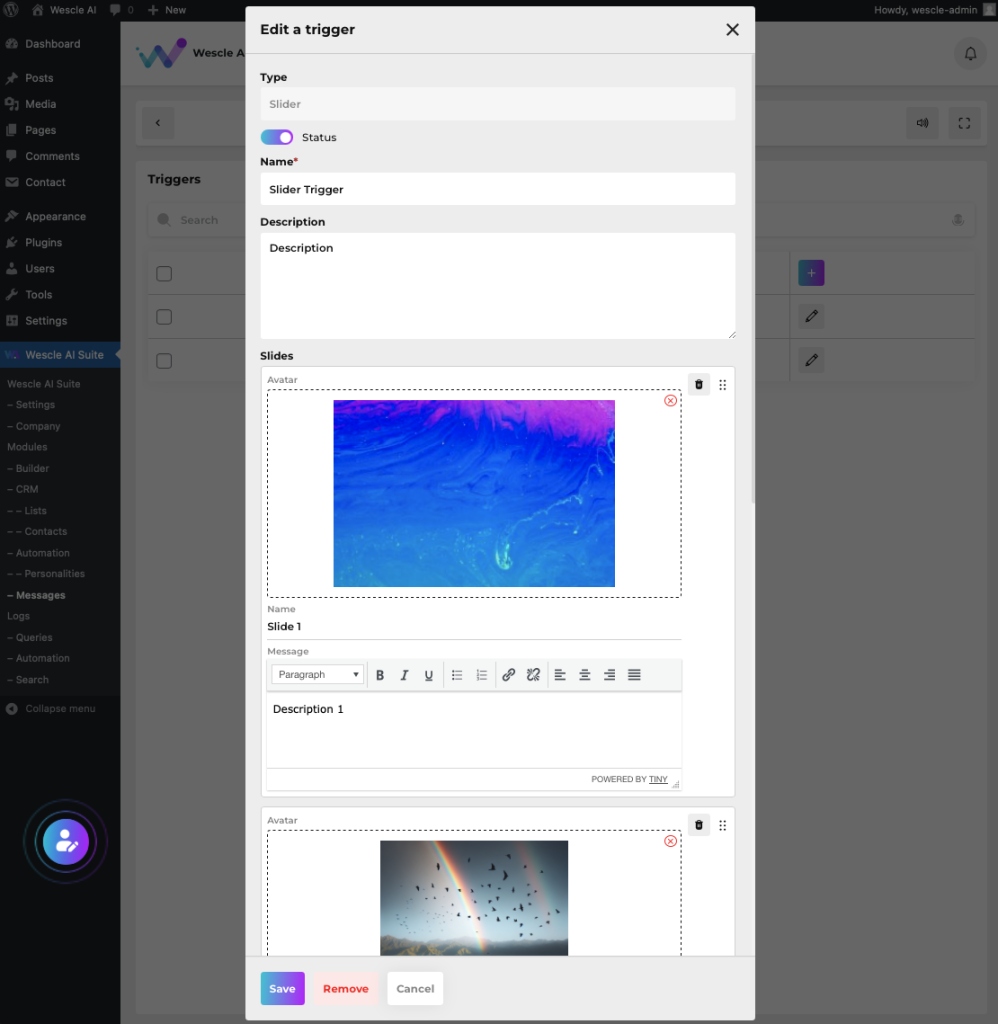
How to create a Slider Trigger:
• Click the ”+” icon and select “Slider” under Type.
• Complete the following:
• Name & Description: Clearly describe your slider’s purpose.
• Slides:
• Add an avatar image (optional).
• Specify the name of the agent or the message title.
• Enter the slider message, formatted with rich text and media.
• Click ”+ Add a slide” to include multiple slides, which will automatically rotate.
• Set timer: Choose how many seconds each slide is displayed before switching.
• Buttons:
• Provide call-to-action text and a URL destination for each button to guide users to specific content.
• Select a CPT or Visitor Page Link: Activate the slider on specific pages or post types.
• Click “Save” to finalize.
Advanced Trigger
Advanced Triggers allow highly customized interactions based on multiple, complex conditions, offering deeper personalization and targeting.
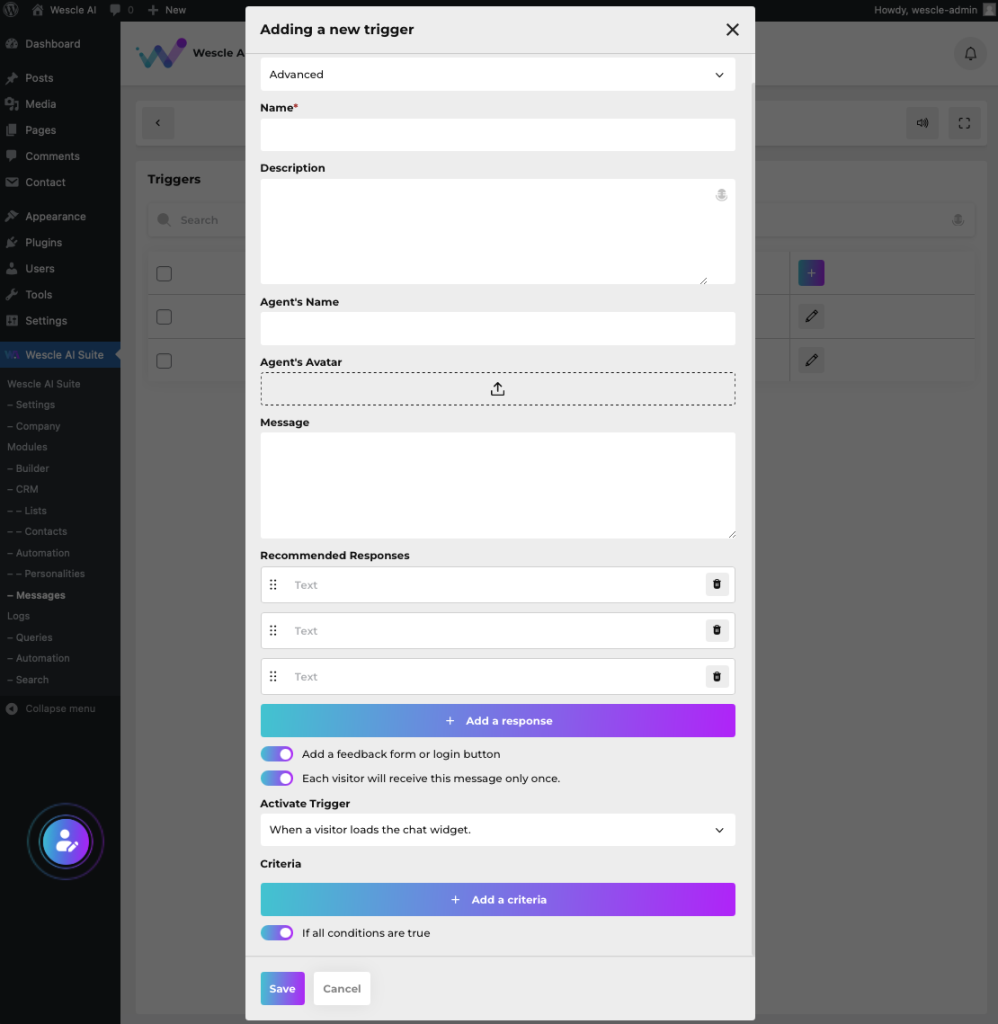
How to create an Advanced Trigger:
• Click ”+” and choose “Advanced” under Type.
• Configure details:
• Name & Description: Clearly indicate the trigger’s purpose.
• Agent’s Name & Avatar: Select an avatar and agent’s name to personalize the interaction.
• Message & Recommended Responses: Create engaging, targeted content, with optional quick replies.
• Toggle options:
• Add feedback form or login button: Encourage engagement or secure interactions.
• Message Frequency: Specify if the message should appear once per visitor.
• Activate Trigger Conditions:
• Set the event that activates the trigger:
• When a visitor loads the chat widget.
• When a visitor initiates a chat request.
• When a visitor sends a message in chat.
• Criteria: Add conditions based on:
• Time of Day, Weekdays, and visitor activity (time spent, currently viewing).
• Visitor Location (IP, city, country).
• Number of Previous Visits or Chats.
• Page details (URL, title, referrer URL).
• Visitor details (name, search terms).
• Device details (browser, platform).
• Online status of widget, agent, visitor.
• Toggle “If all conditions are true” to set whether all listed conditions must be met simultaneously for activation.
• Click “Save” to activate the advanced trigger.
Triggers greatly enhance visitor engagement by automating timely, relevant interactions, ultimately improving user experience and conversion rates.